This website uses cookies for analytics and functionality purposes. To change your cookie settings or find out more, click here.
If you continue browsing our website, you accept these cookies.

Set-Up and Host Video Conferencing From the Web

Setting up and hosting a video conference with RingCentral is easy and convenient. And with our recent 6.3 launch, hosting and scheduling a video meeting is simpler than ever. You can utilize all kinds of features such as screen sharing, mark-up and drawing tools, integrated chat and multi-point HD video conferencing. You can even hold meetings with up to 50 participants on RingCentral Office Enterprise edition; for smaller meetings, you can choose our Premium edition with 25 people per meeting, or Standard edition with 4 people per meeting (see our plans and pricing to learn more).
Below are the necessary steps to set up, schedule and host a video conference meeting using RingCentral on your desktop, or laptop, computer via the web.
Prestep: Make sure you have the RingCentral Meetings App installed on your computer.
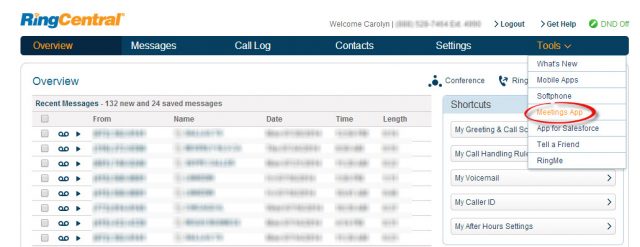
If you have not already done so, you can download the free app, available for Mac and PC, by logging into your RingCentral account, and then selecting “Meetings App” from the drop-down menu under “Tools”, see image below for reference.
Then, follow the prompts to install the RingCentral Meetings App directly to your computer.
Step 1: Click on the “RingCentral Meetings” App icon on your computer and then click “Host a Meeting.”

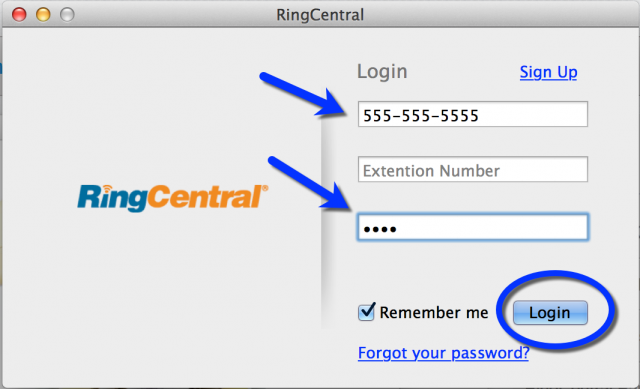
Step 2: Log-in to your RingCentral account from the Meetings App.
You will need to log-in to your RingCentral account from the App on your computer. After the first time logging-in it should automatically save your information, so you will most likely only need to complete this step once. Be sure to enter your information exactly as you normally would so that your Meetings are set to sync with your other RingCentral account information. If your phone has an extension, enter that into the second bar. Then click “Remember me” if you want your meetings icon to sign in automatically each time. Click the “Login” button when you are finished.
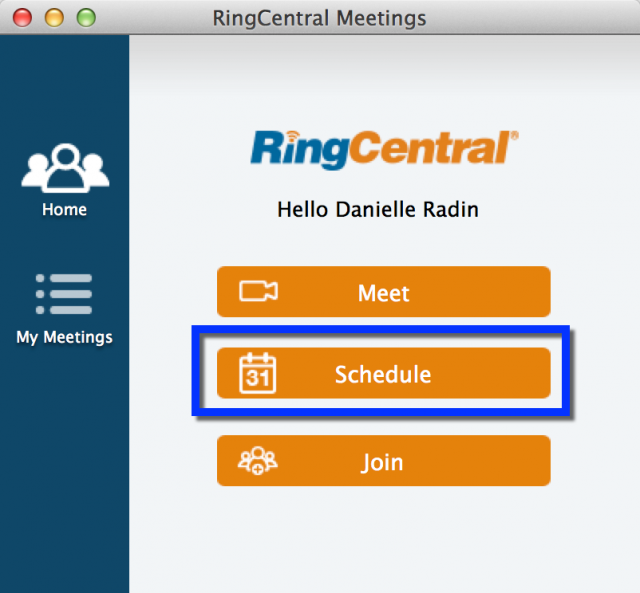
Step 3: Click the “Schedule” button in the middle of the screen.
Once you are logged in the first time, this field will come up automatically because of the “Remember Me” setting you clicked on previously. Clicking the “Schedule” button will allow you to choose a day and time for your meeting. If you want to meet in the moment, simply click on the “Meet” button on the top. If you are trying to join a meeting that you are not hosting, you can click on the “Join” button on the bottom.
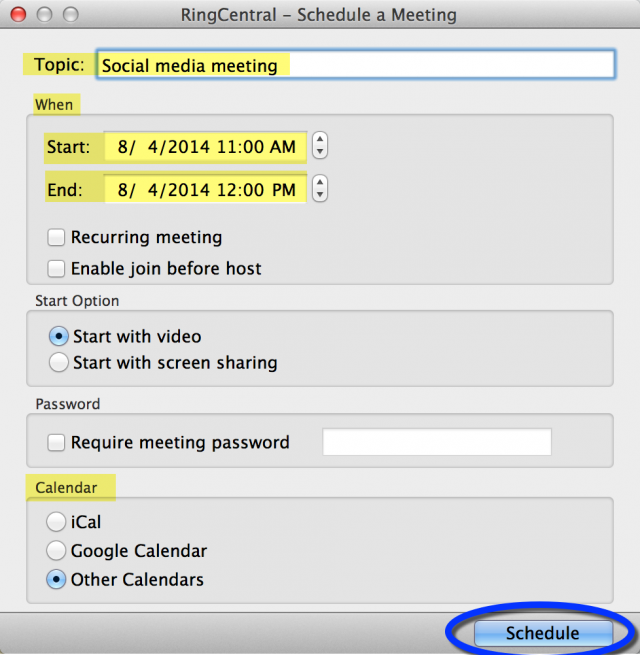
Step 4: Give your meeting a title, date and time.
Perhaps the most crucial step is scheduling your meeting. You want to name your meeting something that will keep both you and the other participants involved organized. You can choose what time the meeting should start and end. If this is a recurring meeting, check the box next to “Recurring Meeting” under the “When” section. [Please note, checking the box to “Enable Join Before Host” will allow other participants to join the meeting before you log into it. We recommend doing this so users won’t have to try connecting to the meeting multiple times before the host joins in.]
For the “Start Option”, you will want to start with video, unless you want everyone in the meeting to see your screen. If the latter is the case, click on “Start with screen sharing”. [Note, if you choose to “Start with video” you, and the other participants, always have the option of turning off your camera once you are actually in the meeting.]
Next, choose what kind of calendar invite you would like this to send to all participants involved in the meeting you are scheduling. iCal comes with all Apple computers, Google calendars is a feature of Gmail, and “Other Calendars” is for any other kind of technology your business uses. At RingCentral, we use something other than iCal and Gmail, so the “Other Calendars” category is checked.
Finally, make sure to click “Schedule” after the recommended fields are filled out.
Step 5: Copy your meeting information to a clipboard and paste it into an E-mail.
Once you schedule your meeting, a confirmation message will pop up. This gives you the number that you and all other participants must use in order to dial into your scheduled meeting, as well as the Meeting ID number for identification and security. You can copy this whole message by clicking on the “Copy to Clipboard” button at the bottom. You can then open an E-mail and click “Edit” then “Paste” in your browser bar to copy all the information into an E-mail. Send that E-mail to the members involved in the meeting, and that’s it!

Congrats, you have set up a meeting as a host using our web video conferencing feature! As you can see, scheduling a meeting is effortless and takes a matter of minutes. Best of all, video meetings offers HD quality and excellent audio. It is almost as if everyone is in the room with you regardless of location. Best of all, anyone you invite can join your meetings, as long as they have a supported device—PC, Mac, iPhone, iPad, Android tablets and smartphones.
For more information about how-to use RingCentral Meetings watch the brief video below:
Go to our website and try RingCentral meetings today!
What our customers say

Thierry Moussu
Head of Digital Relations, Direct Energie
Scalable and open, the RingCentral Engage platform was exactly what we needed both in terms of our increasing contact load and our desire to be innovative with regard to digital customer relations.


Frédéric Gonin
Head of Customer Service Transformation CANAL+
RingCentral Engage is a pillar in our customer care strategy. RingCentral Engage’s software and expertise has helped us to improve quality of service, enable peer support and self-service, and move our subscriber interactions into the digital domain.


Marie-Hélène Albertini
Head of Forums and Social Networks, Customer Service, Orange France
RingCentral Engage has enabled us to embrace our customers on digital channels at scale. The solution was able to satisfy the complex and demanding standards of our business, reconciling the imperatives of community marketing and corporate communications with the obligations of customer service helped us to improve quality of service.